| Developer Edition or higher | Community Edition | SonarCloud™ |
|---|
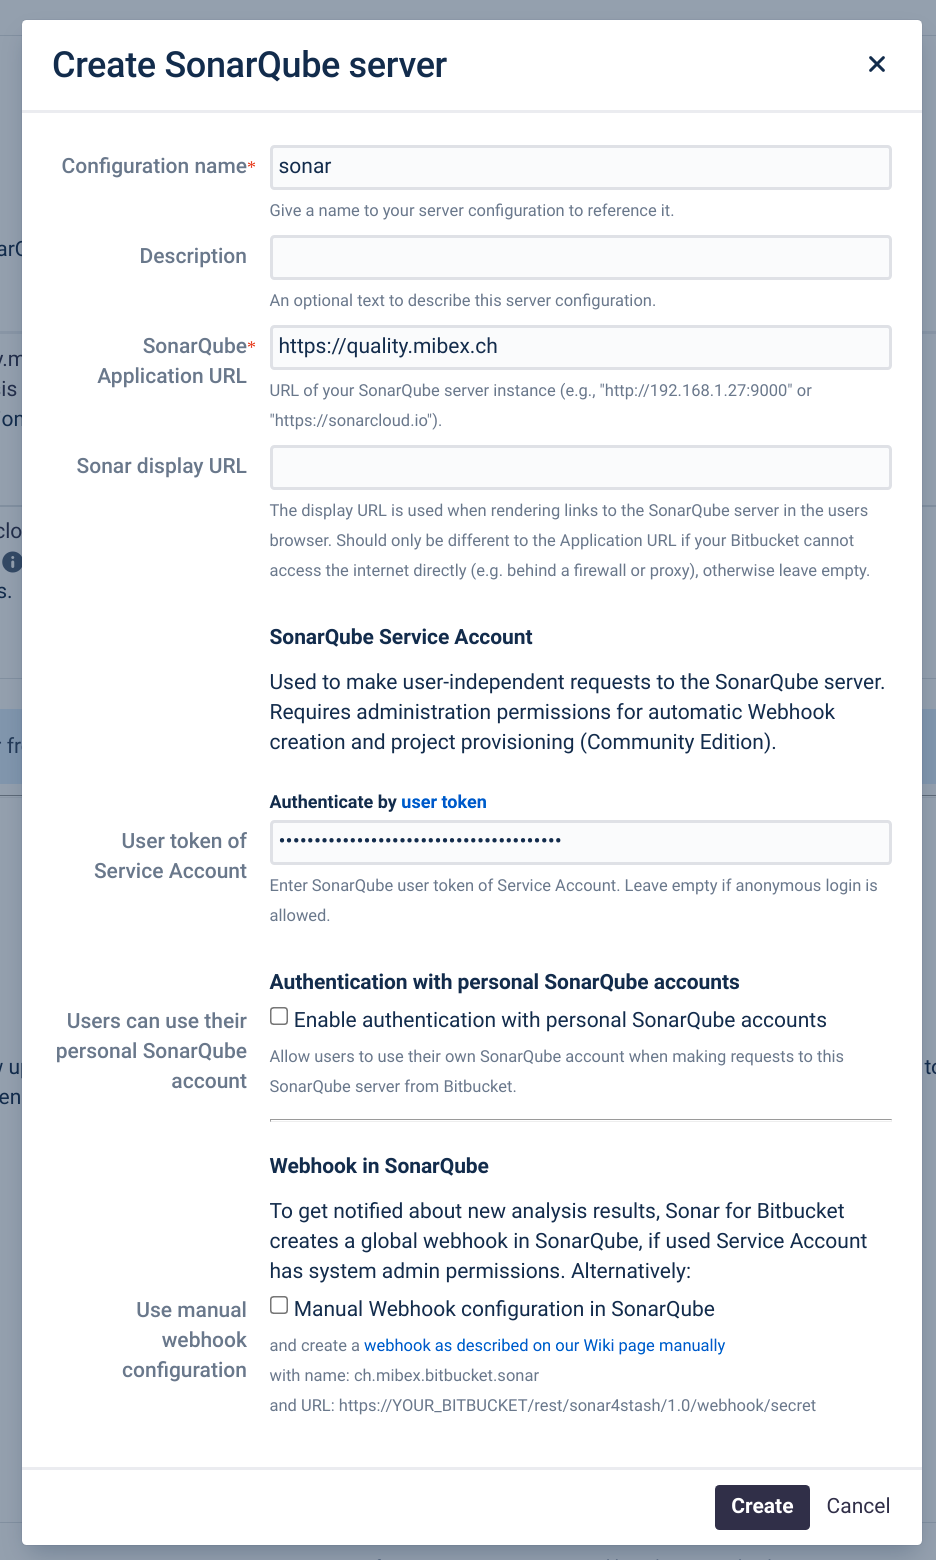
| 1 | Add a SonarQube™ server configuration in the Sonar™ for Bitbucket app under Bitbucket Admin → Sonar™. Configure name and SonarQube™ Application URL Add a User Token of the SonarQube™ Service Account. It should have system admin permissions to allow automatic webhook setup, otherwise a manual webhook configuration is required.
 | Follow the same steps as for Developer Edition or higher Community Edition version 7.9.x and 8.3+:
You will be asked to enter a replacement character for illegal characters in SonarQube™ project keys. | Add a SonarQube™ server configuration in the Sonar™ for Bitbucket app under Bitbucket Admin → Sonar™. Configure name Add https://sonarcloud.io as SonarQube™ Application URL Add your Sonar™ Cloud organization key  Add a User Token of the SonarQube™ Service Account. It should have project admin permissions to allow automatic webhook setup.
|
| 2 | Configure Sonar™ Analysis based on your build infrastructure. If you use Bamboo, a seamless integration is possible with our Include Code Quality for Bamboo app. Follow our Sonar Sonar™ Analysis Configuration guide and configure the analysis parameters for your SonarQube™ version based on the Analysis Parameter Matrix. | Panel |
|---|
| panelIconId | atlassian-light_bulb_on |
|---|
| panelIcon | :light_bulb_on: |
|---|
| panelIconText | :light_bulb_on: |
|---|
| bgColor | #E6FCFF |
|---|
| Include Code Quality for Bitbucket 6.0 supports multiple SonarQube™ projects for the same repository. To use it, configure the Sonar™ Analysis on sub directories of the repositories |
| Follow the same steps as for Developer Edition or higher | Info |
|---|
The SonarQube™ Community Edition does not know about branches and pull requests. A separate SonarQube™ project for each branch is used to show SonarQube™ information for pull requests and branches. The app expects Sonar™ project keys in the format <projectKey>:<branchName> More details can be found in our Sonar™ Analysis Configuration guide |
Community Edition version 7.9.x and 8.3+:
Use the same illegal branch character replacement in the Sonar™ analysis as configured in the Sonar™ server settings of step (1) | Follow the same steps as for Developer Edition or higher |
| 3 | Run a Sonar™ Analysis on the main branch of the repository where you want to enable the app. Verify that the analysis results are available in SonarQube™. | Panel |
|---|
| panelIconId | atlassian-light_bulb_on |
|---|
| panelIcon | :light_bulb_on: |
|---|
| panelIconText | :light_bulb_on: |
|---|
| bgColor | #E6FCFF |
|---|
| For multiple SonarQube™ projects for the same repository: ensure the analysis results are available on each project in SonarQube™ |
| Follow the same steps as for Developer Edition or higher | Follow the same steps as for Developer Edition or higher |
| 4 | Connect one or more SonarQube™ project to a Repository (Repository → Settings → Sonar™) Click Add new SonarQube™ project 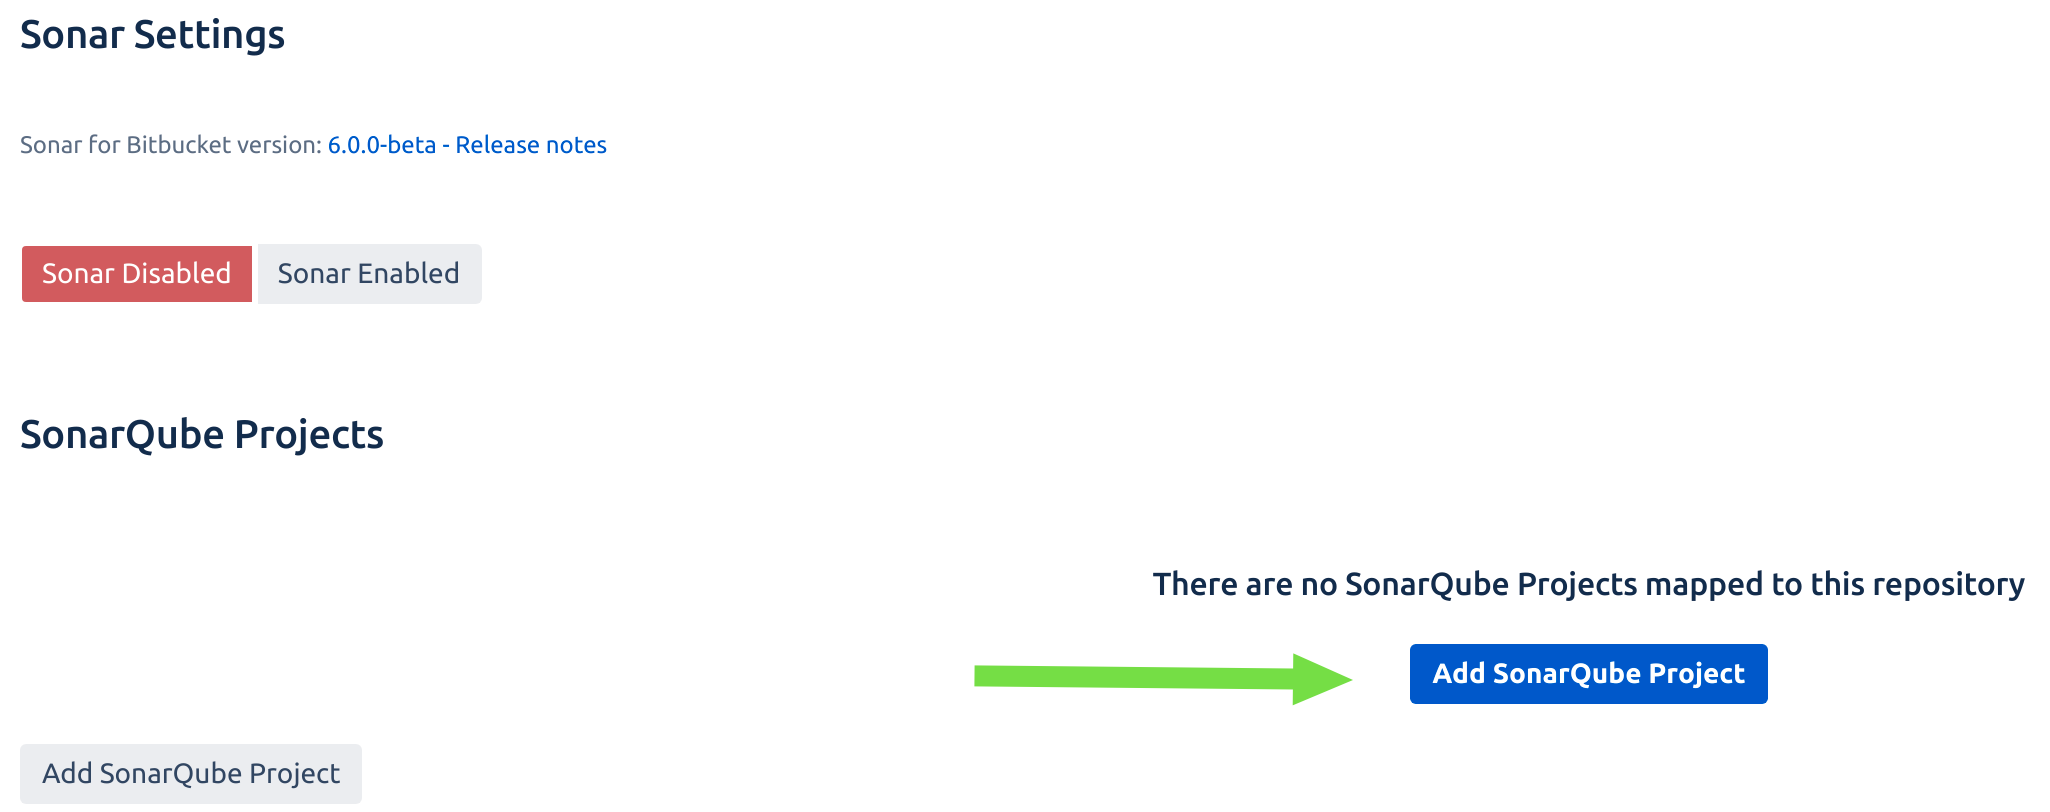 Select the Module Directory of the project. Leave empty for a single SonarQube™ project in the repository. Select a subfolder of the repository for multiple projects. Select the appropriate SonarQube™ server and SonarQube™ project - Configure the Sonar™ analysis directory:
to the path where the analysis runs must start with the module directory
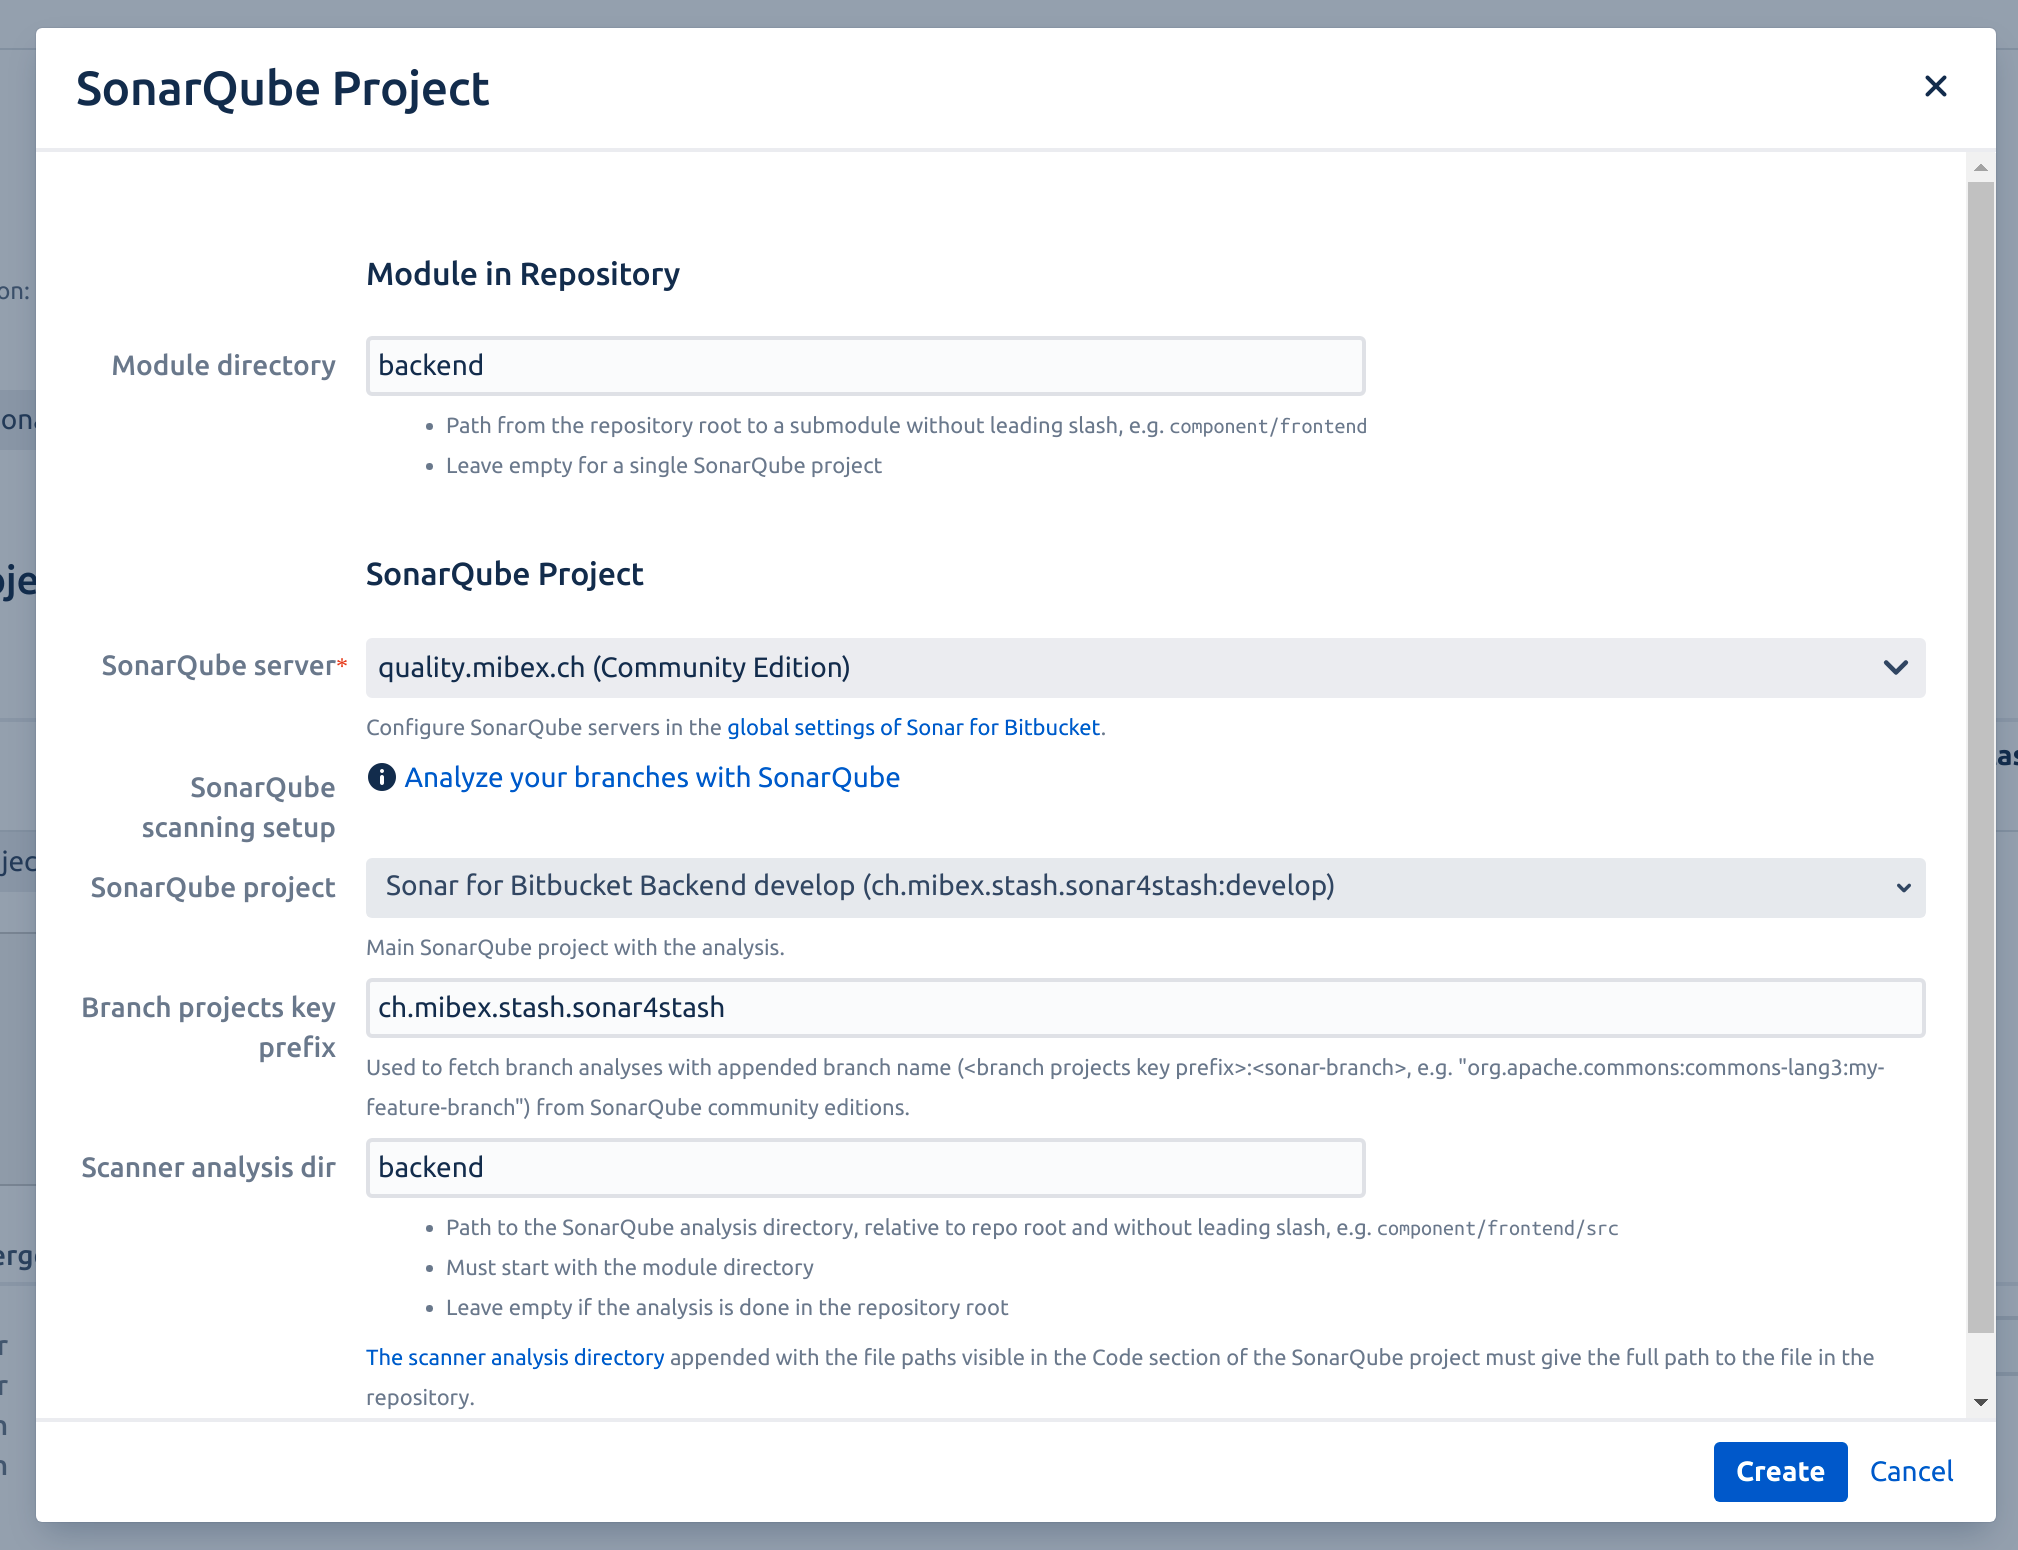 | Follow the same steps as for Developer Edition or higher and additionally set: Branch project key prefix, which is used together with the branch name for the branch projects in SonarQube™
| Follow the same steps as for Developer Edition or higher |
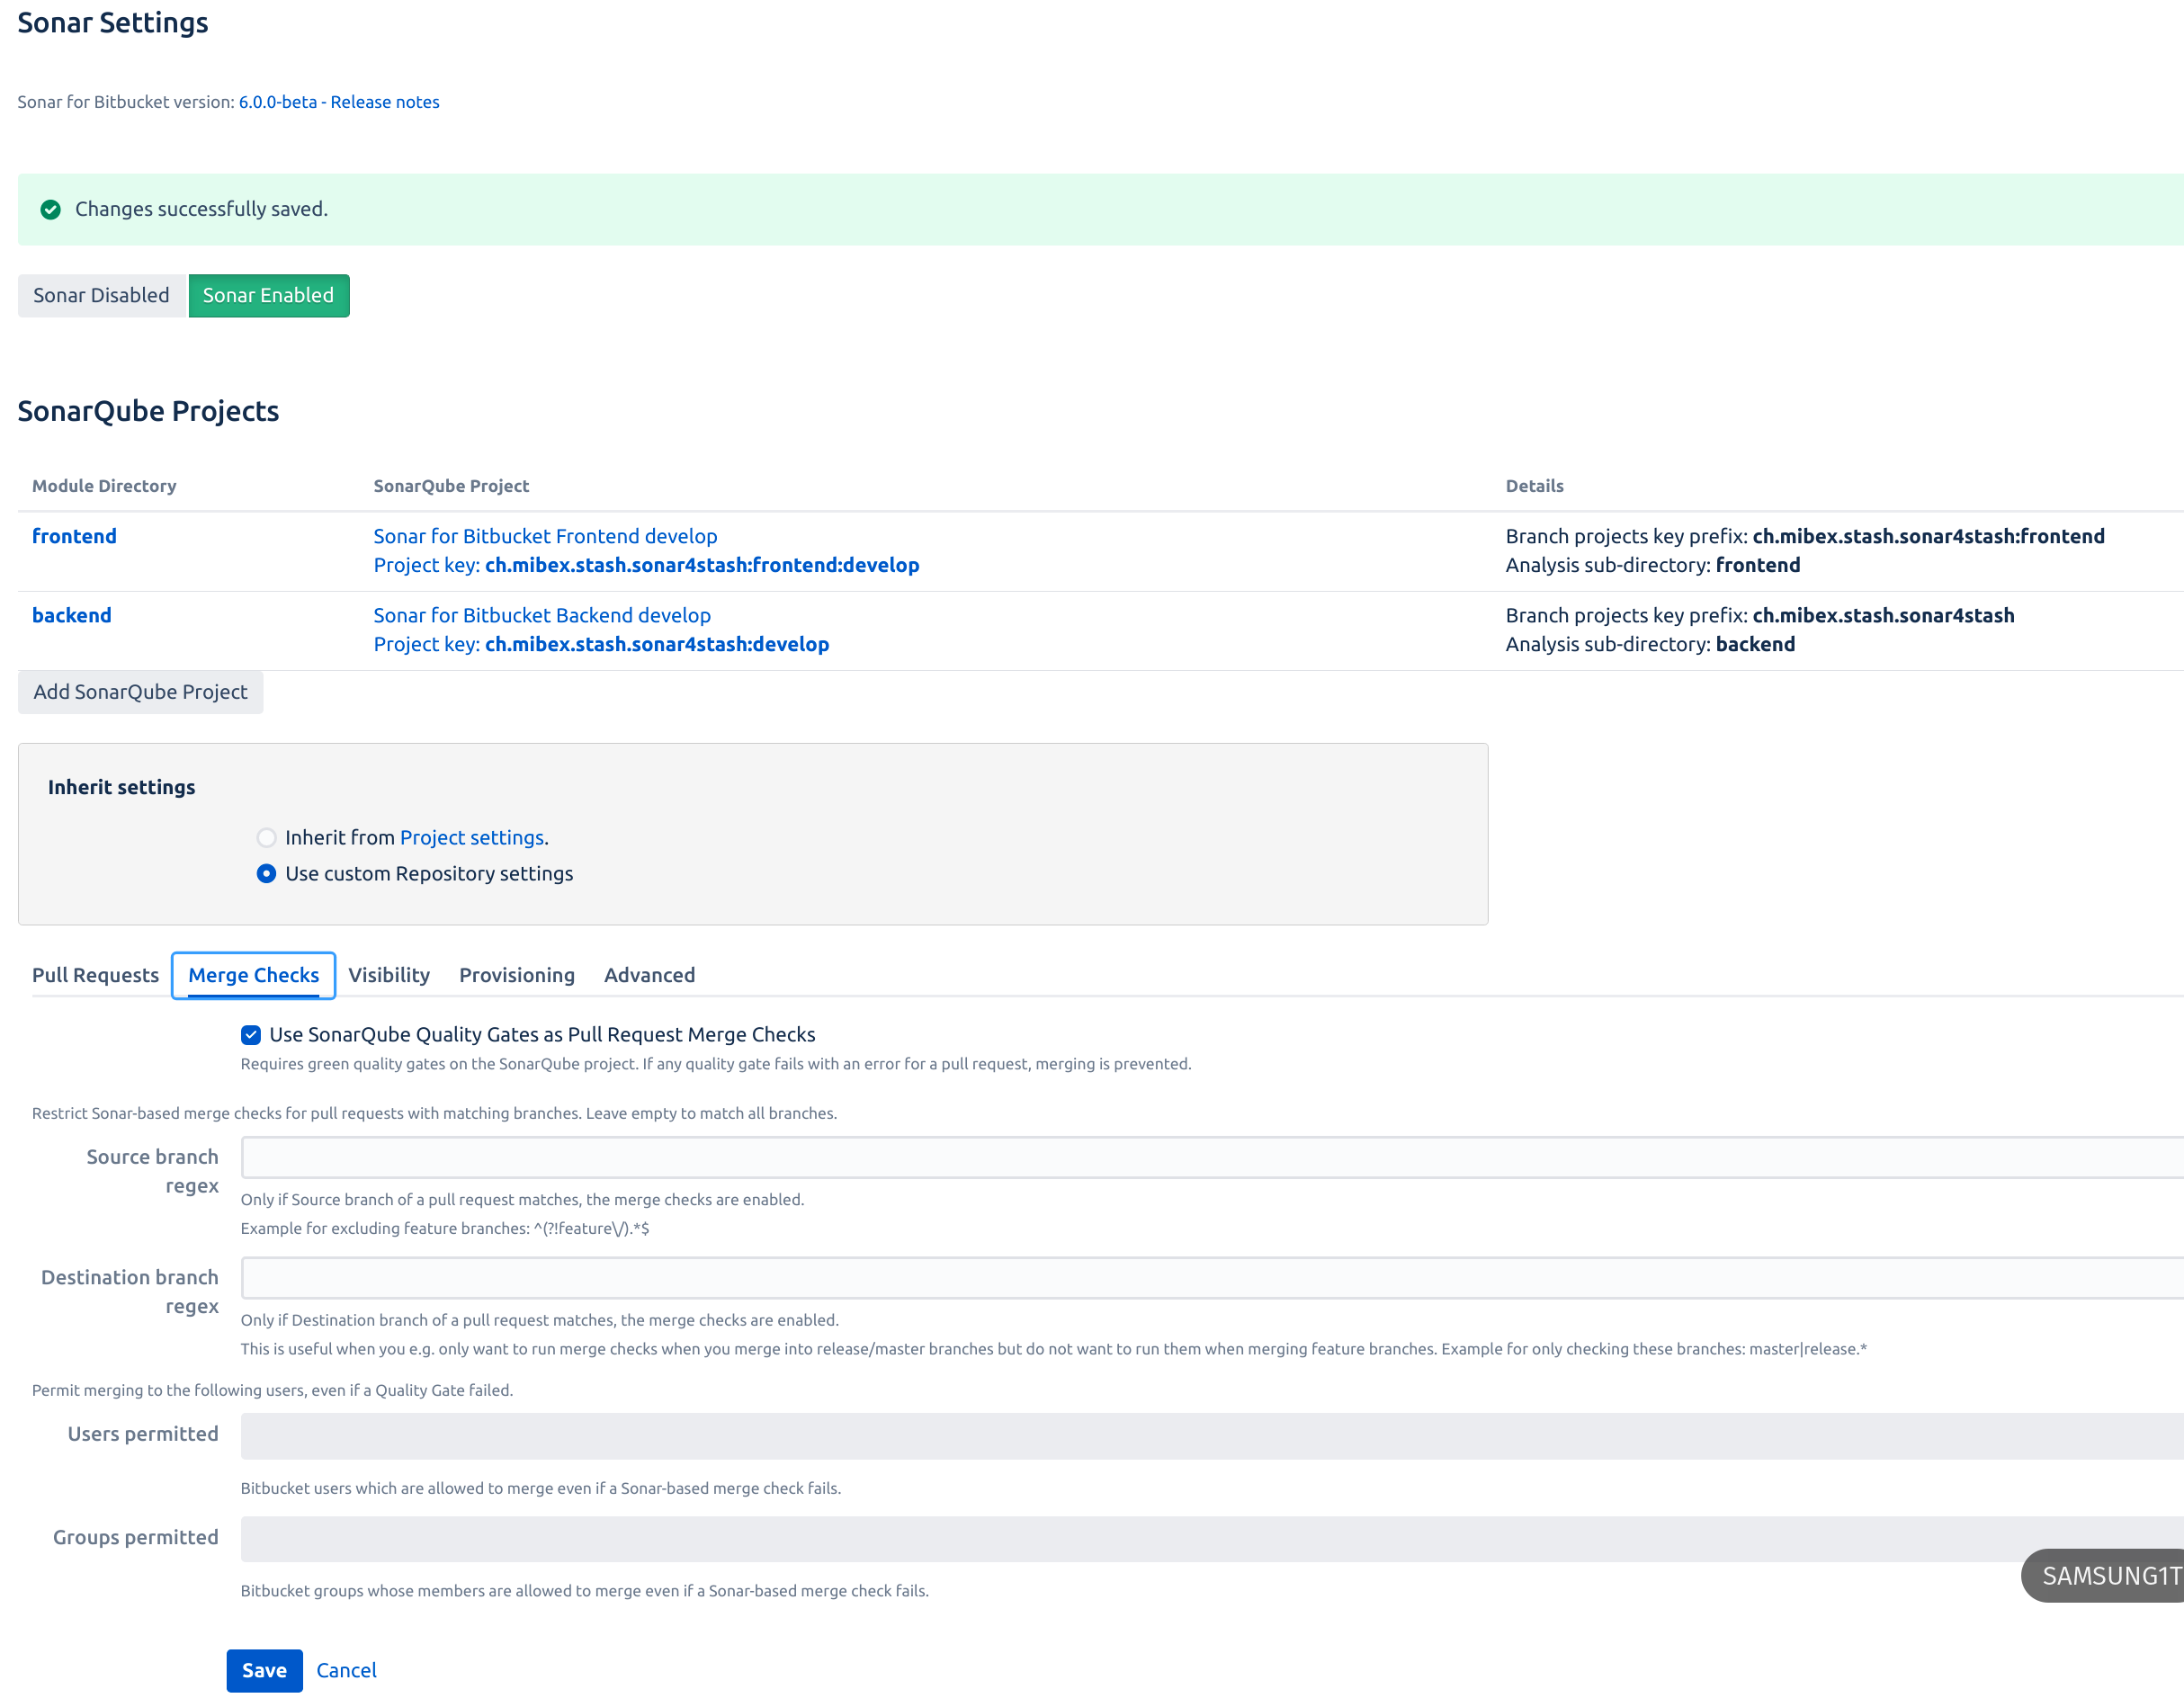
| 5 | Enable Sonar™ for Bitbucket in the settings page of your repository (Repository → Settings → Sonar™) Verify you have one or more SonarQube™ projects linked to the repository. Configure additional settings in the tabs if required.  enable Merge Checks based on SonarQube™ quality gates to enforce high code quality: enable Merge Checks based on SonarQube™ quality gates to enforce high code quality:
☑ ‘Use SonarQube™ Quality Gates as Pull Request Merge Checks’
Toggle the Sonar™ Enabled button
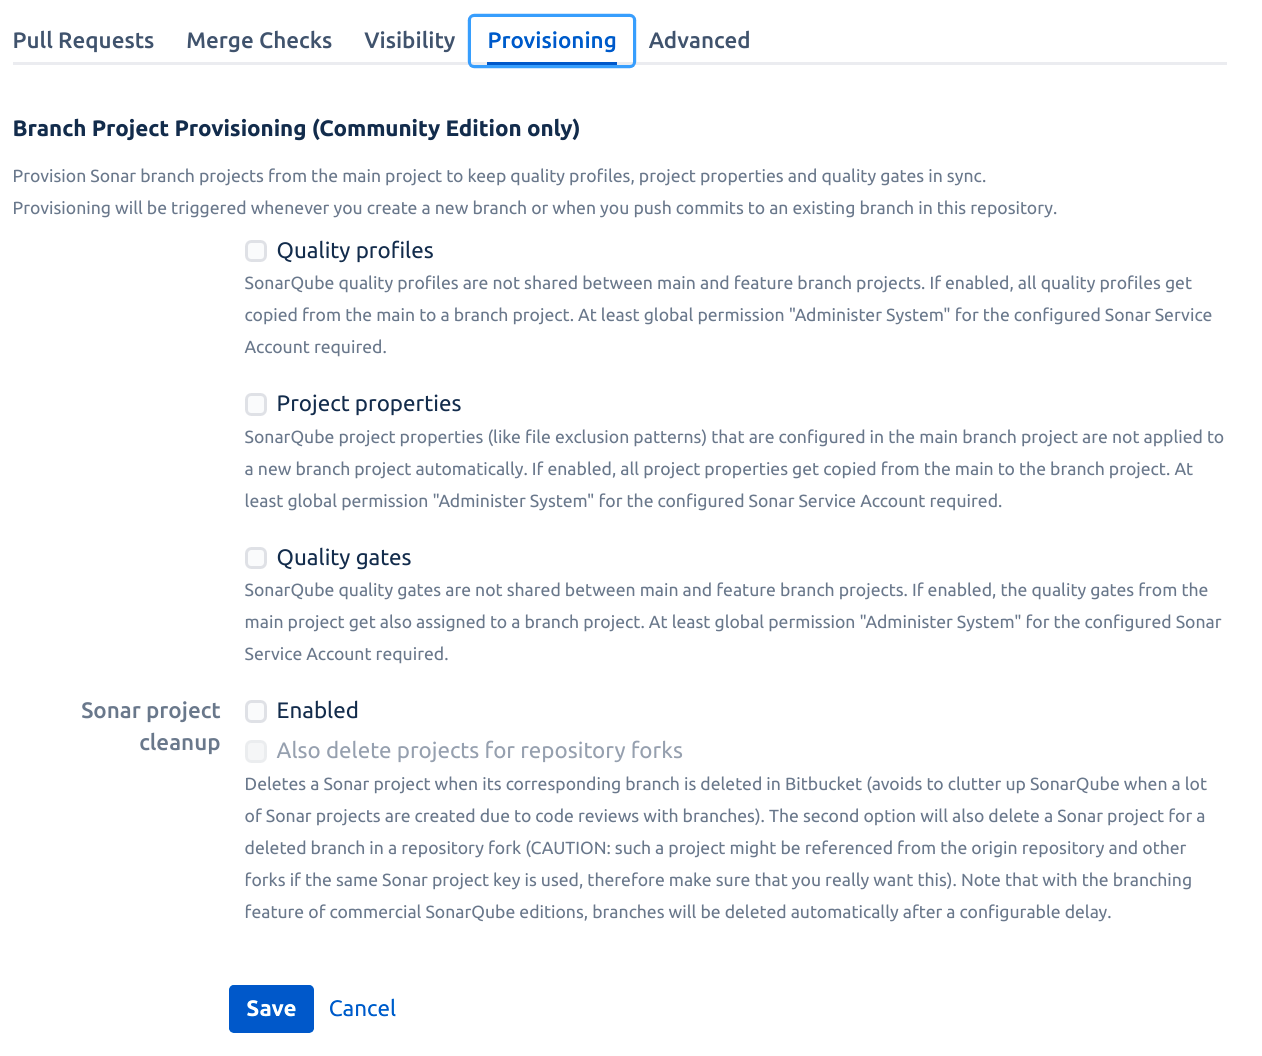
 | Follow the same steps as for Developer Edition or higher and additionally set: Configure the branch project provisioning if you want the project settings from the main project copied to the branch projects
 | Follow the same steps as for Developer Edition or higher |
| 6 | Go to Repository → Source View of the already analyzed main branch. You should see the issue annotations: 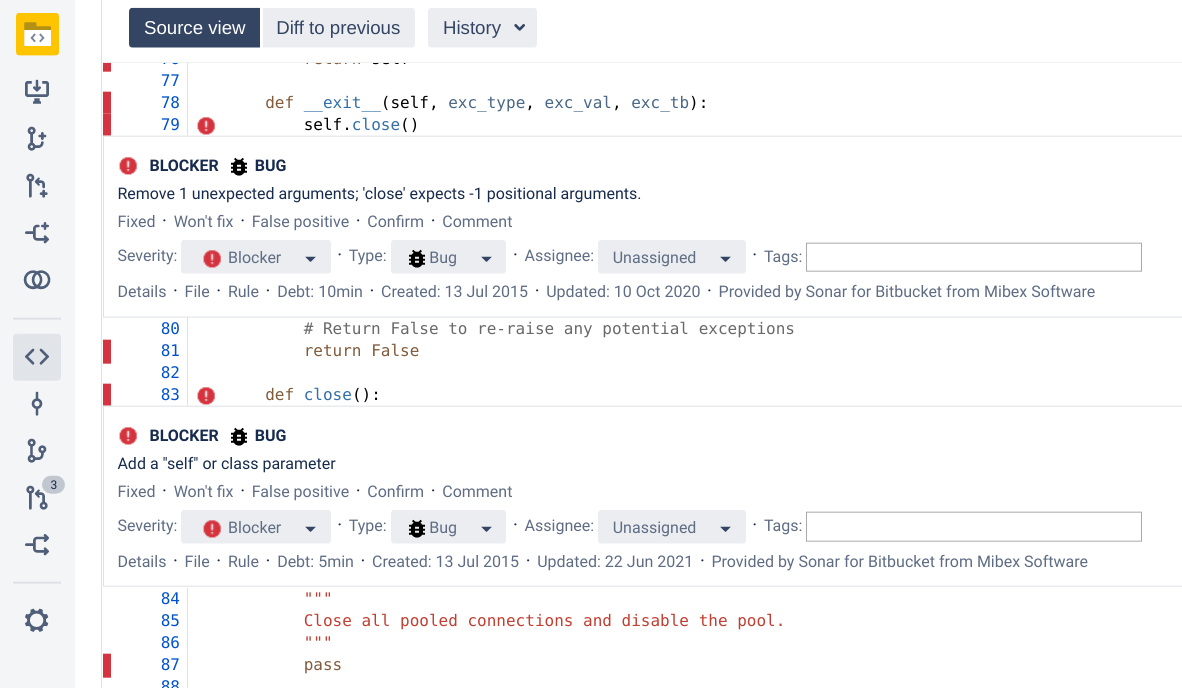 If you cannot see Sonar™ issues or test coverage in here, please follow our configuration checklist to find out what went wrong. | Follow the same steps as for Developer Edition or higher | Follow the same steps as for Developer Edition or higher |
| 7 | Create a new branch and add a commit with some issues in it. Create a pull request from that branch. Your Sonar™ Analysis Configuration should pick up the new pull request and analyze it correctly. 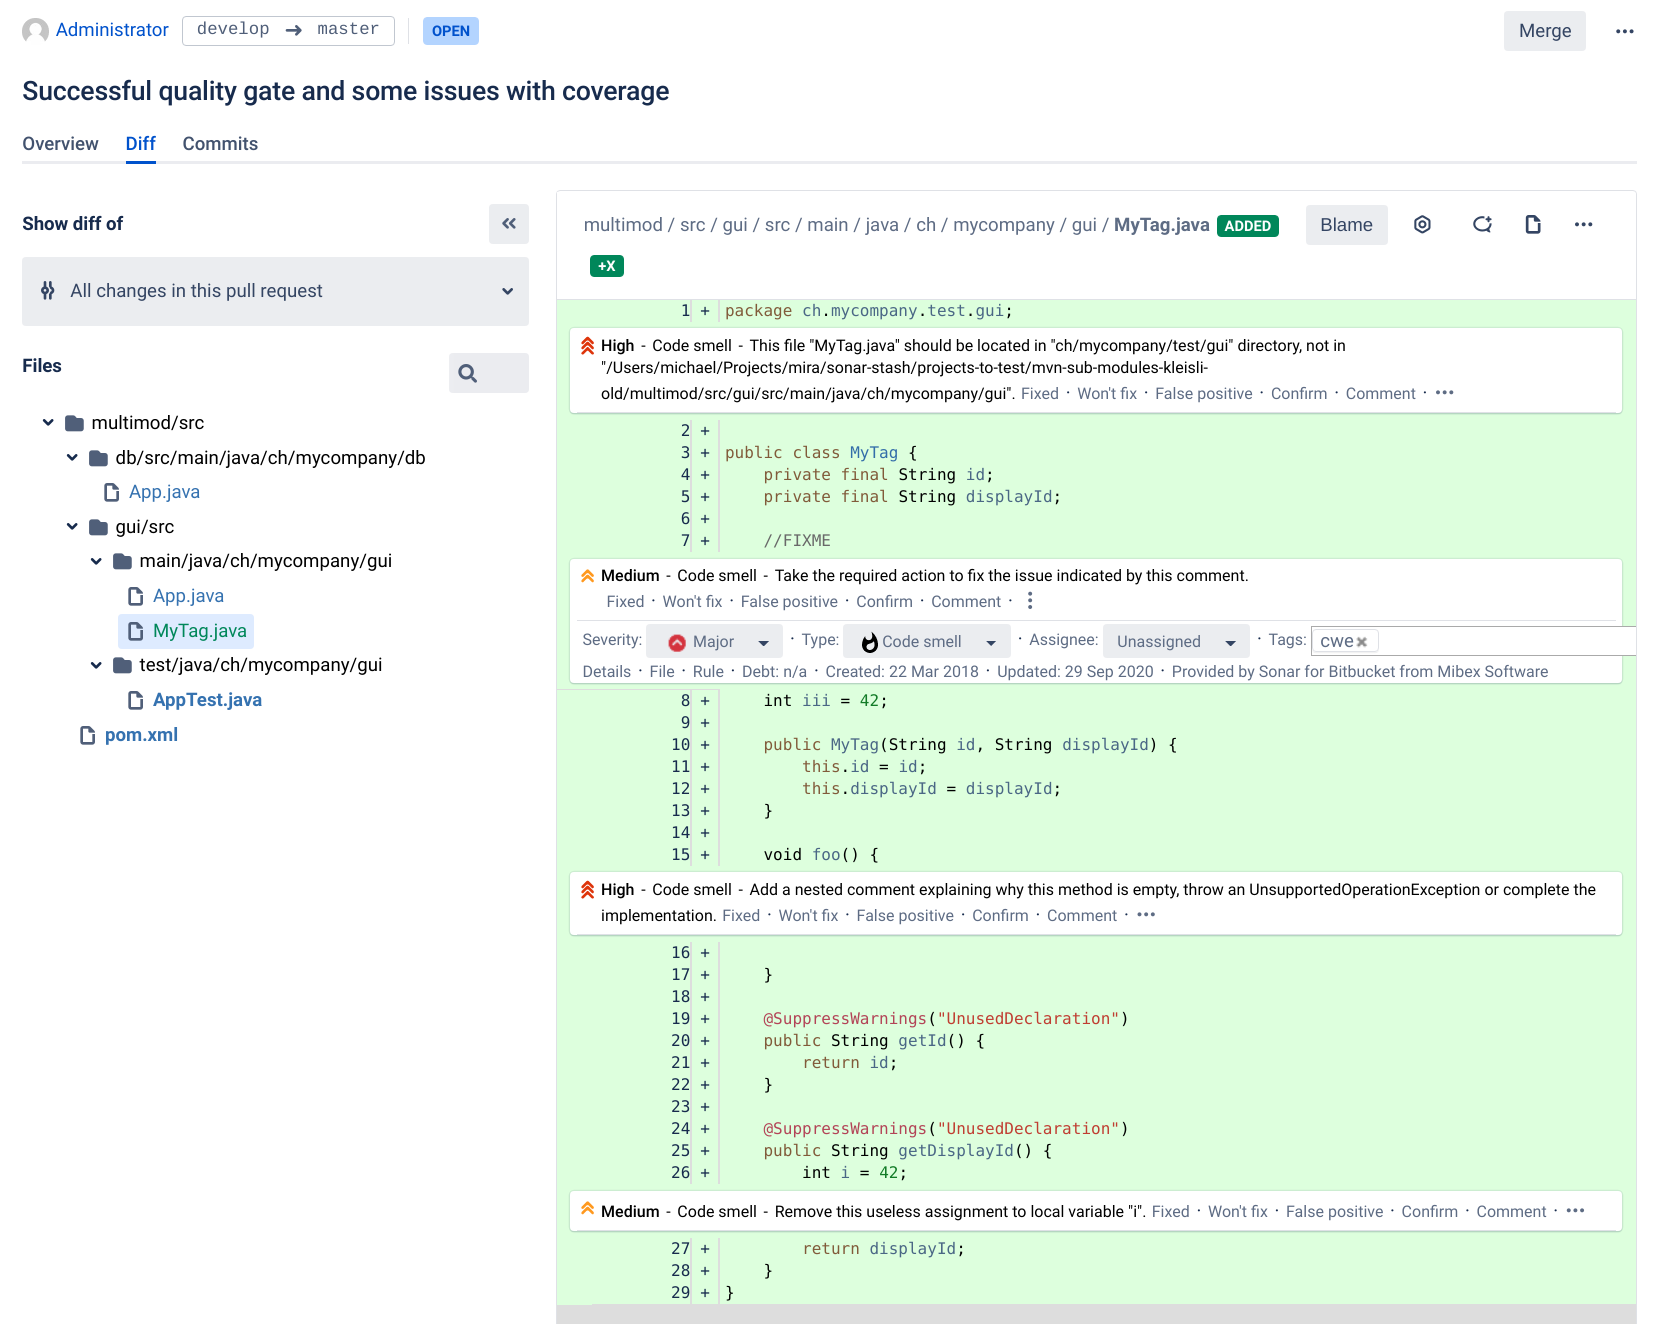  If you cannot see Sonar™ issues or test coverage in here, please follow our configuration checklist to find out what went wrong. | Follow the same steps as for Developer Edition or higher | Follow the same steps as for Developer Edition or higher |